前言
本人前端小白一枚,刚工作半年,在这段时间里也先后跟了不少项目,也接触到了不少框架,但是都是基于 React 的,所以想趁着有时间来看一下 React 源码,增强自己对 React 这个框架的理解。源码的学习方式主要是 视频 + 技术文章。望与诸君共勉~
React 基础与 API
早期的 react 源码中 react 和 react-dom 在同一个包,后来为了做平台移植性,将 react 与 react-dom 分拆,相信做过 react-native 的同学都知道,我们写 react-native 项目时,也是用的 react,只是表现层用了 react-native 的组件与 api。所以看 react 源码我们先分析 react 对于 api 的定义。
React 的源码都在 packages 文件夹中,首先我们来看一看 React 源码中的 React.js 文件,其路径为:packages/react/src/React.js。这个文件不长,大概只有一百多行,那 React 在这个文件中到底做了什么呢?我们不妨看看,下面展示的是部分代码:
import ReactVersion from "shared/ReactVersion";
import {
  REACT_FRAGMENT_TYPE,
  REACT_PROFILER_TYPE,
  REACT_STRICT_MODE_TYPE,
  REACT_SUSPENSE_TYPE,
  REACT_SUSPENSE_LIST_TYPE
} from "shared/ReactSymbols";

import { Component, PureComponent } from "./ReactBaseClasses";
import { createRef } from "./ReactCreateRef";
import { forEach, map, count, toArray, only } from "./ReactChildren";
import {
  createElement,
  createFactory,
  cloneElement,
  isValidElement,
  jsx
} from "./ReactElement";
import { createContext } from "./ReactContext";
import { lazy } from "./ReactLazy";
import forwardRef from "./forwardRef";
import memo from "./memo";
import {
  useCallback,
  useContext,
  useEffect,
  useImperativeHandle,
  useDebugValue,
  useLayoutEffect,
  useMemo,
  useReducer,
  useRef,
  useState,
  useResponder,
  useTransition,
  useDeferredValue
} from "./ReactHooks";从上述代码可以看到import { Component, PureComponent } from "./ReactBaseClasses";,这说明 React 从ReactBaseClasses这个文件中引入了Component和PureComponent,这两个名字我们并不陌生,因为我们在写代码的时候,除了函数式组件,我们开头的第一句代码都通常是:class extends from Compontent/PureCompontent。
Component 和 PureComponent
由 React.js 文件代码我们知道,Component和PureComponent都是从ReactBaseClasses这个文件中引入的,所以我们打开这个文件,可以看到Component和PureComponent相应的定义:
/**
 * Base class helpers for the updating state of a component.
 */
function Component(props, context, updater) {
  this.props = props;
  this.context = context;
  // If a component has string refs, we will assign a different object later.
  this.refs = emptyObject;
  // We initialize the default updater but the real one gets injected by the
  // renderer.
  this.updater = updater || ReactNoopUpdateQueue;
}

// 部分代码省略……
function ComponentDummy() {}
ComponentDummy.prototype = Component.prototype;
/**
 * Convenience component with default shallow equality check for sCU.
 */
function PureComponent(props, context, updater) {
  this.props = props;
  this.context = context;
  // If a component has string refs, we will assign a different object later.
  this.refs = emptyObject;
  this.updater = updater || ReactNoopUpdateQueue;
}

const pureComponentPrototype = (PureComponent.prototype = new ComponentDummy());
pureComponentPrototype.constructor = PureComponent;
// Avoid an extra prototype jump for these methods.
Object.assign(pureComponentPrototype, Component.prototype);
pureComponentPrototype.isPureReactComponent = true;上述代码中可以看到,两者的定义其实是一样的,区别在于PureComponent在定义完之后给原型上多绑定了一些内容ComponentDummy,这个函数是起一个桥接转换的作用。在定义的最后给PureComponent增加了一个标志位isPureReactComponent,并将其设置为 true。我们可以在源代码文件夹中搜索一下这个单词,发现其出现在ReactFiberClassComponent这个文件中,具体代码片段如下: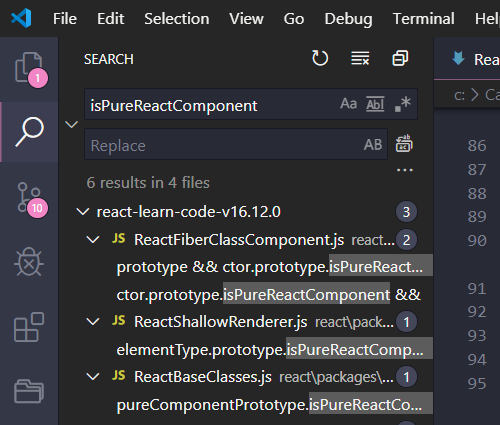
if (ctor.prototype && ctor.prototype.isPureReactComponent) {
  return !shallowEqual(oldProps, newProps) || !shallowEqual(oldState, newState);
}通过判断isPureReactComponent的值是否为true来决定是否进行shallowEqual(浅对比),如果值为true的话,则通过比较新旧 state 和 props 的值来判断是否需要更新。类似的对比还有一个地方,就是shouldComponentUpdate。
createRef 和 forwardRef
createRef
接着往下看代码,发现又从ReactCreateRef中import了一个createRef。那这个是干嘛的呢?我们打开ReactCreateRef.js文件,发现这个文件很简单。它定了一个refObject,然后定义了一个current属性并将其指定为null。最终在初始化的时候,它会把当前元素绑定在current这个属性上。用户可以根据这个属性获取当前元素。
import type { RefObject } from "shared/ReactTypes";

// an immutable object with a single mutable value
export function createRef(): RefObject {
  const refObject = {
    current: null
  };
  if (__DEV__) {
    Object.seal(refObject);
  }
  return refObject;
}
在新版的 ref 用法中,其抛弃了字符串的赋值方式,以后只能用以下两种方式使用 ref:
// 在组件实例化的时候,给组件赋值一个React.createRef(),在DOM绑定的时候通过this.ref的方式或者是以函数形式去传递
class App extends React.Component {
  constructor() {
    this.ref = React.createRef();
  }
  render() {
    // this.ref
    return <div ref={this.ref} />;
    // 或者是函数形式
    return <div ref={node => (this.ref = node)} />;
  }
}
forwardRef
那与createRef相关的就是forwardRef了,我们打开forwardRef.js,他的源码比较复杂,我们先不看和开发环境相关的内容,即不看if (__DEV__) {...},然后这个代码可以写成:
import {REACT_FORWARD_REF_TYPE, REACT_MEMO_TYPE} from 'shared/ReactSymbols';
import warningWithoutStack from 'shared/warningWithoutStack';

export default function forwardRef<Props, ElementType: React$ElementType>(
  render: (props: Props, ref: React$Ref<ElementType>) => React$Node,){
    if (__DEV__) {...}
    return {
      $$typeof: REACT_FORWARD_REF_TYPE,
      render,
    };
  }
可以看到它最终返回的是一个
$$typeof: REACT_FORWARD_REF_TYPE,它的组件类型,然后返回了render。可以看到 render 是在forwardRef中间返回,所以forwardRef他是解决组件之间 Props 的传递问题。类似的,antd 中很多组件也使用到了forwardRef。比如 form 组件中,我们经常会使用@Form.create()这样一个高阶组件(装饰器)来将 form 组件相关的 props 操作绑定到我们封装的组件上。例如:this.props.validate。ReactChildren
从
ReactChildren这个名词我们就能看出他是一个复数,是多个存在的。它里面有一些操作,我们可以将其类比于数组,数组有 forEach、map 这些方法,ReactChildren也有,只不过它的实现方式比较巧妙,他用到了递归。我们以forEachChildren这个方法为例,从代码可以看出当他的children为null的时候,直接return;function forEachChildren(children, forEachFunc, forEachContext) { if (children == null) { return children; } const traverseContext = getPooledTraverseContext( null, null, forEachFunc, forEachContext ); traverseAllChildren(children, forEachSingleChild, traverseContext); releaseTraverseContext(traverseContext); }当
children不为null的时候,他会往后执行,会定义一个traverseContext(遍历上下文),利用getPooledTraverseContext方法来获取遍历上下文对象,traverseContextPool将相当于存放traverseContext的一个池子,如果池子不为空的话,就弹出pop()最后一个上下文对象,并对其进行一些赋值操作后返回。如果池子为空,也将返回一个对象。//省略部分代码... const traverseContextPool = []; function getPooledTraverseContext( mapResult, keyPrefix, mapFunction, mapContext ) { if (traverseContextPool.length) { const traverseContext = traverseContextPool.pop(); traverseContext.result = mapResult; traverseContext.keyPrefix = keyPrefix; traverseContext.func = mapFunction; traverseContext.context = mapContext; traverseContext.count = 0; return traverseContext; } else { return { result: mapResult, keyPrefix: keyPrefix, func: mapFunction, context: mapContext, count: 0 }; } }获取到
traverseContext之后再往下执行,会遇到一个traverseAllChildren函数,这个函数同样是判断children是否为null,如果为null直接返回 0 ,如果不为null,通过traverseAllChildrenImpl方法进行下一步操作(这个方法的定义代码比较长,这里就不贴出来了),从代码中可以看出,这个方法定义了一个叫type的类型值来获取children的类型,如果这个type的值是undefined或者是boolean的话,直接将children置为null并返回,这也是为什么我们在书写组件的时候如果传入的是空或者是true/false,会直接渲染成空。function traverseAllChildren(children, callback, traverseContext) { if (children == null) { return 0; } return traverseAllChildrenImpl(children, "", callback, traverseContext); }除了
type之外,还有一个invokeCallback变量表示是否执行callback,默认值是false,即不执行。如果children为null的时候,就将其置为true,执行callback,如果children不为null的时候,则进一步判断children类型,若类型是string则不做处理;若类型是number,也将invokeCallback置为true;若children的类型是object的时候,则进一步判断children的$$typeof属性,如果它的值是REACT_ELEMENT_TYPE则不做处理,如果它的值是REACT_PORTAL_TYPE则将invokeCallback置为true。最终根据invokeCallback的值判断是否执行callback。
继续往下看代码,我们会看到它定义了一些变量:child、nextName、subtreeCount、nextNamePrefix等,然后我们会看见如下代码,判断children是否是数组,如果是则会再次调用traverseAllChildrenImpl这个函数,到此我们就发现这个函数调用了它自己,也就是递归。if (Array.isArray(children)) { for (let i = 0; i < children.length; i++) { child = children[i]; nextName = nextNamePrefix + getComponentKey(child, i); subtreeCount += traverseAllChildrenImpl( child, nextName, callback, traverseContext ); } } else { // ...省略的代码 }完成遍历之后,则利用
releaseTraverseContext函数来释放traverseContext遍历上下文对象,即将traverseContext所有属性置为null,count赋值为 0,并在traverseContextPool没满的时候将其压进traverseContextPool中。function releaseTraverseContext(traverseContext) { traverseContext.result = null; traverseContext.keyPrefix = null; traverseContext.func = null; traverseContext.context = null; traverseContext.count = 0; if (traverseContextPool.length < POOL_SIZE) { traverseContextPool.push(traverseContext); } }该文件中也包含一些其他类似于数组的 api :forEach, map, count, toArray, only ,这些方法都是对于 reactChildren 的处理。
createElement 与 cloneElement
继续看 React.js 文件,我们会发现它从
ReactElement中引进了createElement,createFactory,cloneElement,isValidElement,jsx,打开ReactElement.js文件,首先找到createElement的定义,它的定义也很简单,传入三个参数:type、config、children,然后根据这三个参数创建对应的ReactElement。所以以前我们在写代码的时候会用到:React.createElement("div", { id: "app" }, "hello world!");但是,
ReactElement到底是什么呢?我们在文件中找到其定义,它需要传入的参数有type, key, ref, self, source, owner, props,定义一个element并将传入的参数赋值给其相应的属性,最后返回这个element。现在我们在使用 react 的时候似乎很少见createElement方法,这是因为在我们现在项目中大多用上了jsx,大多时候是babel帮我们将 jsx 转换为createElement。const ReactElement = function(type, key, ref, self, source, owner, props) { const element = { // This tag allows us to uniquely identify this as a React Element $$typeof: REACT_ELEMENT_TYPE, // Built-in properties that belong on the element type: type, key: key, //用于后期diff算法 ref: ref, props: props, // Record the component responsible for creating this element. _owner: owner // 私有属性,它只是用作去标记,做一个记录 }; if (__DEV__) { //...省略 } return element; };另外,我们来看一看,
createFactory,由它的定义可以看出,它借用了createElement,对其用 bind 进行绑定,并将其 type 属性指定为传入的 type,然后返回,它其实创建的也是一个ReactElement。export function createFactory(type) { const factory = createElement.bind(null, type); // Expose the type on the factory and the prototype so that it can be // easily accessed on elements. E.g. `<Foo />.type === Foo`. // This should not be named `constructor` since this may not be the function // that created the element, and it may not even be a constructor. // Legacy hook: remove it factory.type = type; return factory; // 其实是ReactElement类型的 }cloneElement与createElement类似,顾名思义,cloneElement所作的就是去克隆我们的这个组件。它进行相应的克隆操作之后,最后返回一个ReactElement。memo
memo 是函数组件中类似 pureComponent 的用法,浅比较函数式组件的 props,确定是否需要更新。
export default function memo<Props>(
  type: React$ElementType,
  compare?: (oldProps: Props, newProps: Props) => boolean
) {
  if (__DEV__) {
    // ...省略
  }
  return {
    $$typeof: REACT_MEMO_TYPE,
    type,
    compare: compare === undefined ? null : compare
  };
}
Fiber、FiberRoot
FiberRoot 和 Fiber 是 React 改良之后一些精巧的数据结构。Fiber 其实就是一个节点,FiberRoot 就是会去指明 root 的一个根节点。和 Fiber 相关内容定义在packages/react-reconciler/src/RactFiber.js中。
Fiber
在 ReactFiber.js 文件中搜索 Fiber 找到其定义;
// Fiber对应一个需要被处理或者已经处理的组件,组件与Fiber可以是一对多关系
type Fiber = {|
  // 不同的组件类型
  tag: WorkTag,
  // ReactElement里面的key,当前child的唯一标识
  key: null | string,
  // ReactElement.type,我们调用`createElement`的第一个参数
  // 用于在当前child协调期间保存标识
  elementType: any,
  // The resolved function/class/ associated with this fiber.
  // 异步组件resolved之后返回的内容,一般是`function`或者`class`,表示函数或class
  type: any,
  // The local state associated with this fiber.
  // 跟当前Fiber相关本地状态(若在浏览器环境中,该值为DOM节点)
  stateNode: any,
  // 指向他在Fiber节点树中的`parent`,用来在处理完这个节点之后向上返回
  return: Fiber | null,
  // 指向自身的第一个子节点
  // 单链表树结构
  child: Fiber | null,
  // 指向自身的兄弟节点
  // 兄弟节点的return与之指向同一个父节点
  sibling: Fiber | null,
  index: number,
  // ref属性
  ref:
    | null
    | (((handle: mixed) => void) & { _stringRef: ?string })
    | RefObject,
  // 新的更新带来的props
  pendingProps: any,
  // 上次渲染完成后的props
  memoizedProps: any,
  // 队列,存放该Fiber对应的组件产生的Update
  updateQueue: UpdateQueue<any> | null,
  // 上一次渲染时的state
  memoizedState: any,
  // 列表,存放这个Fiber依赖的context
  firstContextDependency: ContextDependency<mixed> | null,
  // 用来描述当前Fiber和他子树的`Bitfield`
  // 共存的模式表示这个子树是否默认是异步渲染的
  // Fiber被创建的时候他会继承父Fiber
  // 其他的标识也可以在创建的时候被设置
  // 但是在创建之后不应该再被修改,特别是他的子Fiber创建之前
  mode: TypeOfMode,
  // Effect
  // 用来记录Side Effect
  effectTag: SideEffectTag,
  // 单链表用来快速查找下一个side effect
  nextEffect: Fiber | null,
  // 子树中第一个side effect
  firstEffect: Fiber | null,
  // 子树中最后一个side effect
  lastEffect: Fiber | null,
  // 代表任务在未来的哪个时间点应该被完成
  // 不包括他的子树产生的任务
  expirationTime: ExpirationTime,
  // 快速确定子树中是否有不在等待的变化
  childExpirationTime: ExpirationTime,
  // 在Fiber树更新的过程中,每个Fiber都会有一个跟其对应的Fiber,current <==> workInProgress
  //在渲染完成后,保存fiber
  alternate: Fiber | null,
  // 调试相关,收集每个Fiber和子树渲染时间
  actualDuration?: number,
  actualStartTime?: number,
  selfBaseDuration?: number,
  treeBaseDuration?: number,
  _debugID?: number,
  _debugSource?: Source | null,
  _debugOwner?: Fiber | null,
  _debugIsCurrentlyTiming?: boolean
|};
FiberRoot
type BaseFiberRootProperties = {|
  // 挂载节点,在ReactDOM.render方法接收的第二个参数
  containerInfo: any,
  // 在持久更新时用到该属性,换言之不支持增量更新平台,在react-dom中不涉及
  pendingChildren: any,
  // 当前应用对应的Fiber,即Root Fiber
  current: Fiber,

  // 以下顺序表示优先级
  // 1) 还没提交(committed)的任务
  // 2) 还未提交的挂起任务
  // 3) 未提交的可能被挂起的任务
  // 在提交时被挂起最老和最新任务
  earliestSuspendedTime: ExpirationTime,
  latestSuspendedTime: ExpirationTime,
  // The earliest and latest priority levels that are not known to be suspended.
  // 不确定是否会挂起的最老和最新任务(所有任务初始化都是该状态)
  earliestPendingTime: ExpirationTime,
  latestPendingTime: ExpirationTime,
  // The latest priority level that was pinged by a resolved promise and can be retried.
  latestPingedTime: ExpirationTime,

  // 如果有抛出错误且此时没有更多更新,此时我们将尝试在处理错误前同步从头渲染
  // 在renderRoot出现无法处理的错误时,该值会被置为`true`
  didError: boolean,

  // 等待提交任务的`expirationTime`属性
  pendingCommitExpirationTime: ExpirationTime,
  // 已经完成的任务的FiberRoot对象,如果你只有一个Root,那他永远只可能是这个Root对应的Fiber,或者是null
  // 在commit阶段,只会处理这个值对应的任务
  finishedWork: Fiber | null,
  // 在任务被挂起时,通过setTimeout设置的返回内容,用来下一次如果有新的任务挂起时清理还没触发的timeout
  timeoutHandle: TimeoutHandle | NoTimeout,
  // 顶层context对象,只有主动调用renderSubtreeIntoContainer时才会使用到
  context: Object | null,
  pendingContext: Object | null,
  // 用来确定在第一次渲染时,是否需要合并
  hydrate: boolean,
  // 当前root对象上所剩余的过期时间
  nextExpirationTimeToWorkOn: ExpirationTime,
  // 当前更新对应的过期时间
  expirationTime: ExpirationTime,
  // List of top-level batches. This list indicates whether a commit should be
  // deferred. Also contains completion callbacks.
  // 顶层批处理任务,该变量指明一个commit是否应该被推迟处理,同时包含了完成处理后的回调
  firstBatch: Batch | null,
  // root之间关联的链表结构
  nextScheduledRoot: FiberRoot | null
|};
通过 Fiber ,我们能够将 JS 渲染的这样一个单线程语言,让它表现为一个多线程,因为在计算机面前无非是时间和空间两者之间的妥协。它里面借助了链表、数等数据结构,以后遇到的时候再详细介绍。
effectTags、ReactWorkTag、sideEffects
这三个文件主要定义了 react 中操作相关的类型,值得一提的是,react 中类型的定义与组合很巧妙,如果之前未使用过这种思路,可以在权限设计系统中试用该方法。
effectTags
/**
 * Copyright (c) Facebook, Inc. and its affiliates.
 *
 * This source code is licensed under the MIT license found in the
 * LICENSE file in the root directory of this source tree.
 *
 * @flow
 */

export type SideEffectTag = number;

// Don't change these two values. They're used by React Dev Tools.
export const NoEffect = /*              */ 0b00000000000;
export const PerformedWork = /*         */ 0b00000000001;

// You can change the rest (and add more).
export const Placement = /*             */ 0b00000000010;
export const Update = /*                */ 0b00000000100;
export const PlacementAndUpdate = /*    */ 0b00000000110;
export const Deletion = /*              */ 0b00000001000;
export const ContentReset = /*          */ 0b00000010000;
export const Callback = /*              */ 0b00000100000;
export const DidCapture = /*            */ 0b00001000000;
export const Ref = /*                   */ 0b00010000000;
export const Snapshot = /*              */ 0b00100000000;

// Update & Callback & Ref & Snapshot
export const LifecycleEffectMask = /*   */ 0b00110100100;

// Union of all host effects
export const HostEffectMask = /*        */ 0b00111111111;

export const Incomplete = /*            */ 0b01000000000;
export const ShouldCapture = /*         */ 0b10000000000;
ReactWorkTag
export const FunctionComponent = 0;
export const ClassComponent = 1;
export const IndeterminateComponent = 2; // Before we know whether it is function or class
export const HostRoot = 3; // Root of a host tree. Could be nested inside another node.
export const HostPortal = 4; // A subtree. Could be an entry point to a different renderer.
export const HostComponent = 5;
export const HostText = 6;
export const Fragment = 7;
export const Mode = 8;
export const ContextConsumer = 9;
export const ContextProvider = 10;
export const ForwardRef = 11;
export const Profiler = 12;
export const SuspenseComponent = 13;
export const MemoComponent = 14;
export const SimpleMemoComponent = 15;
export const LazyComponent = 16;
export const IncompleteClassComponent = 17;
sideEffects
/**
* Copyright (c) Facebook, Inc. and its affiliates.
*
* This source code is licensed under the MIT license found in the
* LICENSE file in the root directory of this source tree.
*
* @flow
*/

export type SideEffectTag = number;

// Don't change these two values. They're used by React Dev Tools.
export const NoEffect = /*              */ 0b00000000000;
export const PerformedWork = /*         */ 0b00000000001;

// You can change the rest (and add more).
export const Placement = /*             */ 0b00000000010;
export const Update = /*                */ 0b00000000100;
export const PlacementAndUpdate = /*    */ 0b00000000110;
export const Deletion = /*              */ 0b00000001000;
export const ContentReset = /*          */ 0b00000010000;
export const Callback = /*              */ 0b00000100000;
export const DidCapture = /*            */ 0b00001000000;
export const Ref = /*                   */ 0b00010000000;
export const Snapshot = /*              */ 0b00100000000;

// Update & Callback & Ref & Snapshot
export const LifecycleEffectMask = /*   */ 0b00110100100;

// Union of all host effects
export const HostEffectMask = /*        */ 0b00111111111;

export const Incomplete = /*            */ 0b01000000000;
export const ShouldCapture = /*         */ 0b10000000000;
Update、UpdateQueue
export type Update<State> = {
  // 更新的过期时间
  expirationTime: ExpirationTime,

  // 该tag标识更新类型
  // UpdateState -> 0;
  // ReplaceState -> 1;
  // ForceUpdate -> 2;
  // CaptureUpdate -> 3;
  tag: 0 | 1 | 2 | 3,
  // 更新内容,如调用setState时接收的第一个参数
  payload: any,
  // 对应的回调函数,调用setState或render时
  callback: (() => mixed) | null,

  // 指向下一个更新
  next: Update<State> | null,
  // 指向下一个side effect
  nextEffect: Update<State> | null,
};

export type UpdateQueue<State> = {
  // 每次操作完更新后的state
  baseState: State,

  // 队首的Update
  firstUpdate: Update<State> | null,
  // 队尾的Update
  lastUpdate: Update<State> | null,

  firstCapturedUpdate: Update<State> | null,
  lastCapturedUpdate: Update<State> | null,

  firstEffect: Update<State> | null,
  lastEffect: Update<State> | null,

  firstCapturedEffect: Update<State> | null,
  lastCapturedEffect: Update<State> | null,
};
Update、UpdateQueue
有了 Fiber 和 FiberRoot 这些基础的结构之后,那我们可以进行数据的更新了,更新是怎么做到的呢?我们来看一下相关的定义文件packages/react-reconciler/src/RactUpdateQueue.js,找到对应的代码片段。我们可以看到 Update 是一个 Node 节点,而 UpdateQueue 是对于 node 节点的一个封装。我们可以看到这个 queue 队列将 update 相关的一些处理例如更新、请求提交等等全部放在了队列中,然后根据优先级的排列去进行 update 的操作更新。
export type Update<State> = {
  // 更新的过期时间,对于update整个操作的一个时间轮询
  expirationTime: ExpirationTime,
  suspenseConfig: null | SuspenseConfig,

  // 该tag标识更新类型
  // UpdateState -> 0
  // ReplaceState -> 1
  // ForceUpdate -> 2
  // CaptureUpdate -> 3
  tag: 0 | 1 | 2 | 3,
  // 更新内容
  payload: any,
  // 对应的回调函数,调用setState或render时
  callback: (() => mixed) | null,

  // 指向下一个更新
  next: Update<State> | null,
  // 指向下一个 side effect
  nextEffect: Update<State> | null,

  //DEV only
  priority?: ReactPriorityLevel
};

export type UpdateQueue<State> = {
  // 每次操作完更新后的state
  baseState: State,

  // 队首的Update
  firstUpdate: Update<State> | null,
  // 队尾的Update
  lastUpdate: Update<State> | null,

  firstCapturedUpdate: Update<State> | null,
  lastCapturedUpdate: Update<State> | null,

  firstEffect: Update<State> | null,
  lastEffect: Update<State> | null,

  firstCapturedEffect: Update<State> | null,
  lastCapturedEffect: Update<State> | null
};
参考资料
结语
React 源码的基础部分就介绍到这里,这才只是刚刚开始,文中有很多地方没有介绍清楚,就等到以后再遇到的时候在介绍,希望我能坚持下去!